John HeathMiniBrute Soundception
How far has your passion for music pushed you? Playing long into the night, mastering a song you promised yourself you’d be able to play, surrounding yourself with gear and spending hours wiring them together in all possible combinations, spending days on finished touches?
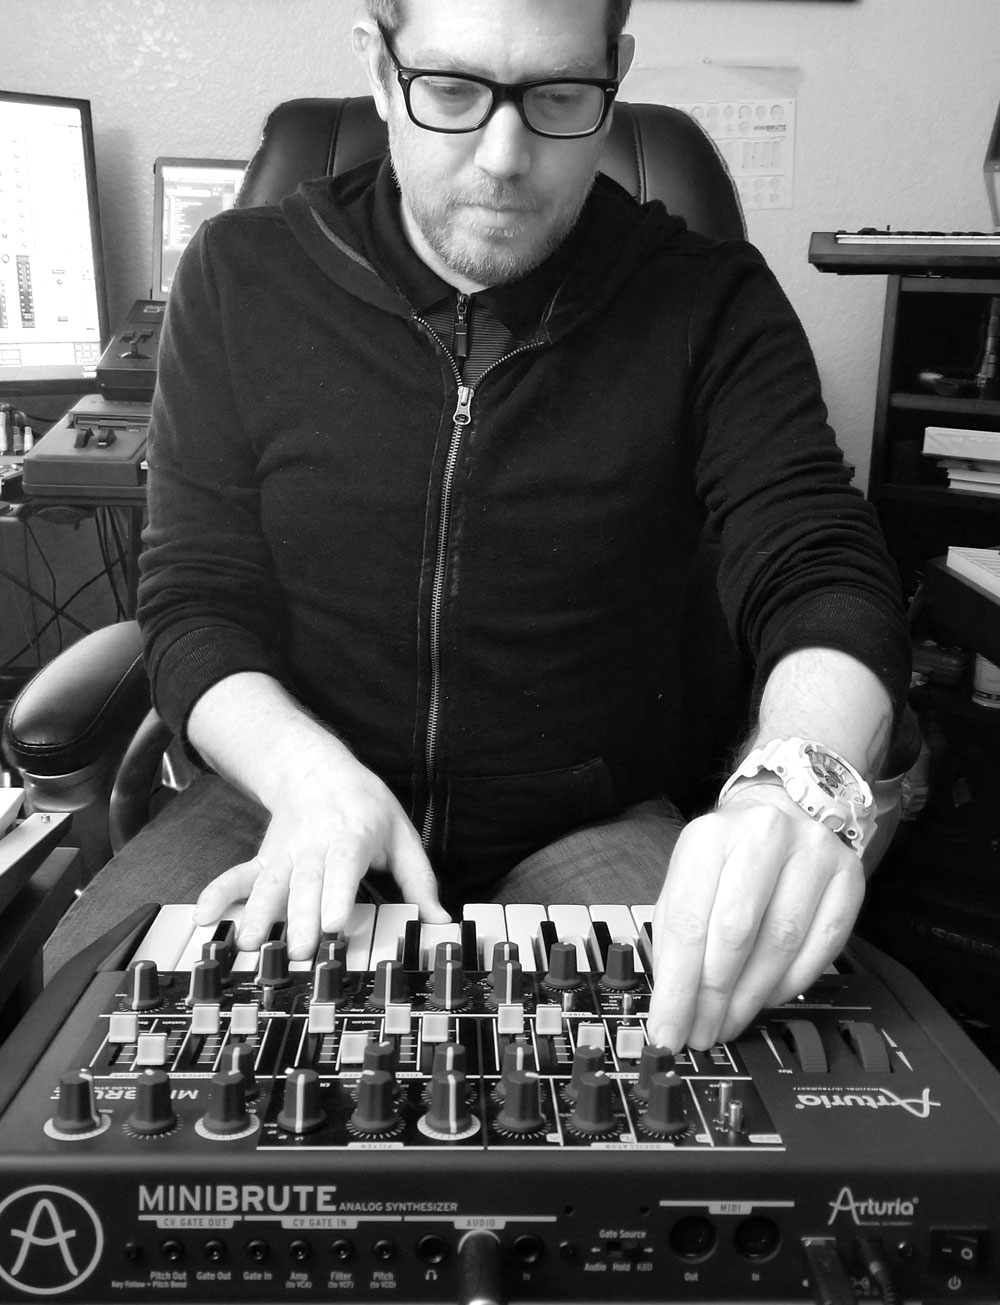
For John Heath, it has been challenging himself to recreate one of the most memorable movie composition ever created, “Time” by Hans Zimmer from the Inception soundtrack, using his MiniBrute as only sound source. After this 6-month long and 132-track wide project in which he invested all of his skill and mastery, John released a video that stunned the internet and drew the attention of eminent synthesizer specialists. We are proud to present the full story behind the track, as told by John himself.
Making oneself
The internet is full of incredible videos of remarkably talented musicians making the most impossible performances look easy. This can often be quite disheartening, often making your own creative efforts seem weak by comparison. Digging a little deeper, you learn that their success lies in dedication, effort, and a huge amount of time and care. This is a valuable source of motivation and optimism, and this is perfectly illustrated by the story of John Heath.
John Heath is a producer and multi-instrumentalist living in Sacramento, California who has been programming synthesizers since he was 16. After saving enough to purchase a Casio CZ-101, and driven by his admiration for bands and artists relying heavily on synthesizers, John decided to seriously invest himself into music. Depeche Mode catalyzed this choice after he saw them in concert as part of their Music for the Masses tour while Vince Clarke, Jean-Michel Jarre, Mark Ellis (Flood) and Don Dorsey became his primary influences. Focusing at first on creating sound rather than music, he was featured in 1987 in the Keyboard Magazine “Patch of the Month” section for some of his CZ-101 patches.
I was a sound designer before I ever was a musician.
Rather than relying on presets to create music, John simply spent time with his synthesizer trying to replicate the sounds he could hear in the recordings of his idols.
I'm actually a self-taught musician. I learned to play music by listening to bands like Yazoo, Depeche Mode, Erarsure, The Cure, New Order, and OMD. My primary goal was just getting the same sound out of my CZ-101 as they were on those songs.
As he explored sound design further and further, he progressively started to build and strengthen his musical knowledge.
In 1988, I received an Atari 520ST for Christmas, and began teaching myself theory, song structure, sequencing, and basic concepts of producing. There was no internet or forums back then, so the majority of my education came from trying to replicate songs I enjoyed, harassing the employees at the local music retailers, and reading Keyboard Magazine.
This was the beginning of a life-long learning process that never ceased since then. John Heath continues to extend his knowledge and competencies, making full use of all the tutorials and free lessons the internet has to offer. For example, he recently attended a masterclass dedicated to Film Scoring from a certain Hans Zimmer.
Although John has has been involved in creating music for mobile apps, animated shorts and a movie, like a large majority of musicians around the world John Heath is not a music professional. Does it affect his dedication? Well…
On average, I try to devote at least a couple of hours a day to music. With more involved projects, like creating Time on the MiniBrute, I spent anywhere from 4-6 hours a day during the week and at least 8 hours a day on the weekends. Normally, I go through phases where I focus on performing/technique, music theory, etc. While working on a project, the focus is always just to get the product done.
There are so many tools and so much technology available and accessible today. It's not like it was before. I think we are all forced to play many roles in the studio today, but I consider myself a producer, first. There are moments in a project where I do focus my energy on other areas, such as composing, sound design, arranging, engineering, but I've always taken the approach that producing is my highest priority. This helps avoid the pitfalls of spending too much time on areas that do not need the time wasted.
We also wanted him to let us know about his personal advice for musicians wanting to take themselves to the next stage.
“Spend time learning your equipment. It's just as important learning your modes and scales. Learn every knob, button, and menu function. Not just what the user guide says a knob will do, but what it actually does to your sounds as you turn it. Your ears will tell you more about the synth than the user guide ever will. It's also ok to not have the latest and greatest 88-note SuperSynth. I started with nothing but a CZ-101 and an old computer. Most of what I know about programming and producing came from those first few years. 30 years later and I'm back to using 1 synth again.”
Preparing one’s journey
Going into the details, we tried to figure out the steps that John had gone through for the recreation of the Inception theme Time, beginning with the way the idea sparked.
I was listening to “Only You” from the Yazoo album Upstairs at Eric's, and always heard Vince Clarke produced the entire track using nothing but the Sequential Circuits Pro-One. This inspired me to recreate a song using only one synthesizer as an exercise in 'limiting my options' in the studio. I purchased the MiniBrute for this very exercise. While taking the Hans Zimmer Film Scoring MasterClass in February I chose ''Time'' as a song to practice orchestral arranging. Ignoring every instinct I had, I decided to combine the concept of producing an entire song on one synthesizer while using a film score arrangement.
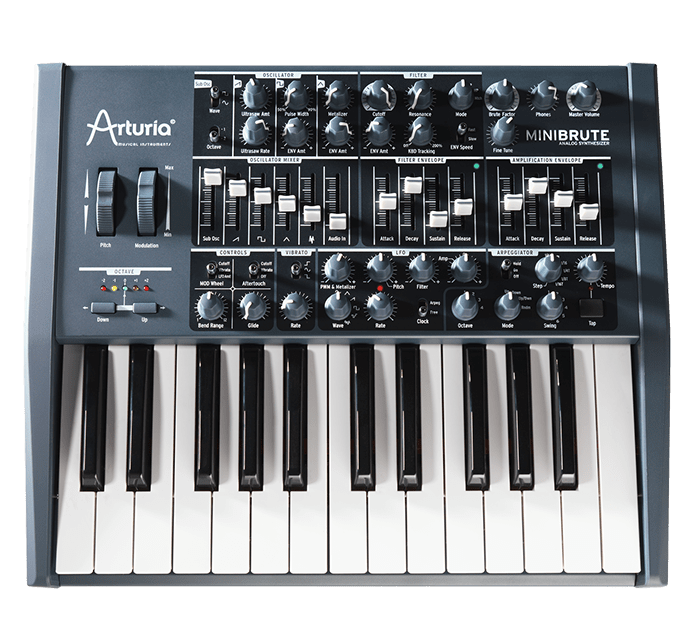
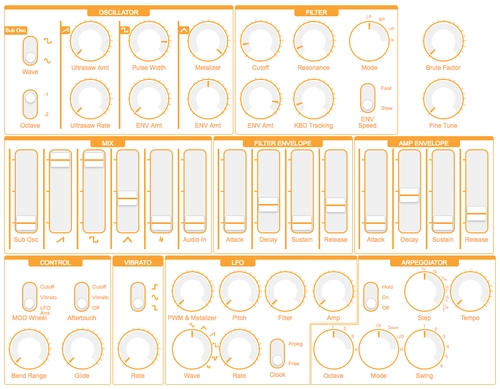
Synthesizers have always been an extremely effective tool for musicians performing live, and producers in the studio. They allow us to express ourselves through both music AND sound. I can strike one key on a synthesizer and express a wide range of emotions. It could be a soft evolving pad with warm reverb or a massive supersaw running through distortion. I chose the Arturia MiniBrute because I was able to get rich warm tones, sharp aggressive leads, and interesting and complex sound with ease. Every parameter impacts sound design so dramatically, yet I never feel like the sound is out of my control.
I was in the market for a monosynth and the MiniBrute gave me everything I wanted.
John followed by explaining his meticulous creative process.
1. Identifying the tracks
The first step in creating this project was to identify the entire song as a whole, which is actually very linear in structure. It begins simply with the piano, a bass and warm pad sounds. From there, the song builds with each pass of the main melody. Next was identifying the various instruments. The song introduces new instruments with each pass, so this made the job of identifying the different parts much easier. I didn't have the score/sheet music, so I relied on YouTube to listen to the song over and over. These first two steps took about two days.
2. Transcribing
Once I identified the instruments, I began the process of transcribing the various parts, individually onto sheet music. This included instruments like the piano. Since I was working with a mono synth, each note path had to be scored separately. Doing this up front, saved time and allowed me to 'trust the process' and just play what was written, while avoiding a lot of headaches during the recording phase. The sheet music/score became the blueprint for all recording. This process took nearly four weeks.
3. Sound Design
The next step was sound design. This entire project was contingent on the ability to produce a convincing piano on the MiniBrute. The piano was the first patch designed and I spent about an hour on it. Once I felt confident with the piano, I went down the list of instruments and began sound design for each. I wanted to avoid the “Fix It In The Mix” mentality. I wanted each of the sounds to be able to stand on its own, even without the post-production FX. Some patches did rely heavily on FX like EQ and Reverb, but I spent as much time as I could designing the sounds to be the best representations as possible, straight out of the synth.
There are so many high-priority parameters on the MiniBrute, and the filter was absolutely vital, but all sound design started with the OSC mix. There are so many sweet-spots to be found here. I would design one sound, but stumbling upon something I could use for another. Also, a huge surprise for me was the Brute Factor knob. It does what it says, however, a careful mix of SAW with soft Filter, and there are places within the Brute Factor knob that will add a certain type of warmth and fatness that would be difficult to emulate, even with an EQ.
4. Recording
After the initial sound design tests, I began the painful process of recording each part, one note path at a time. I relied heavily on the individual parts I scored onto sheet music, and just went down the list. Instruments like the piano took 28 passes; to be able to record each note within the chords. The bass took only 4 passes. Instruments like the violins/violas took 32, cellos took 12 and lead violins took an additional 12. The multiple passes accounted for each of the note lines and pan/position in the stereo field.
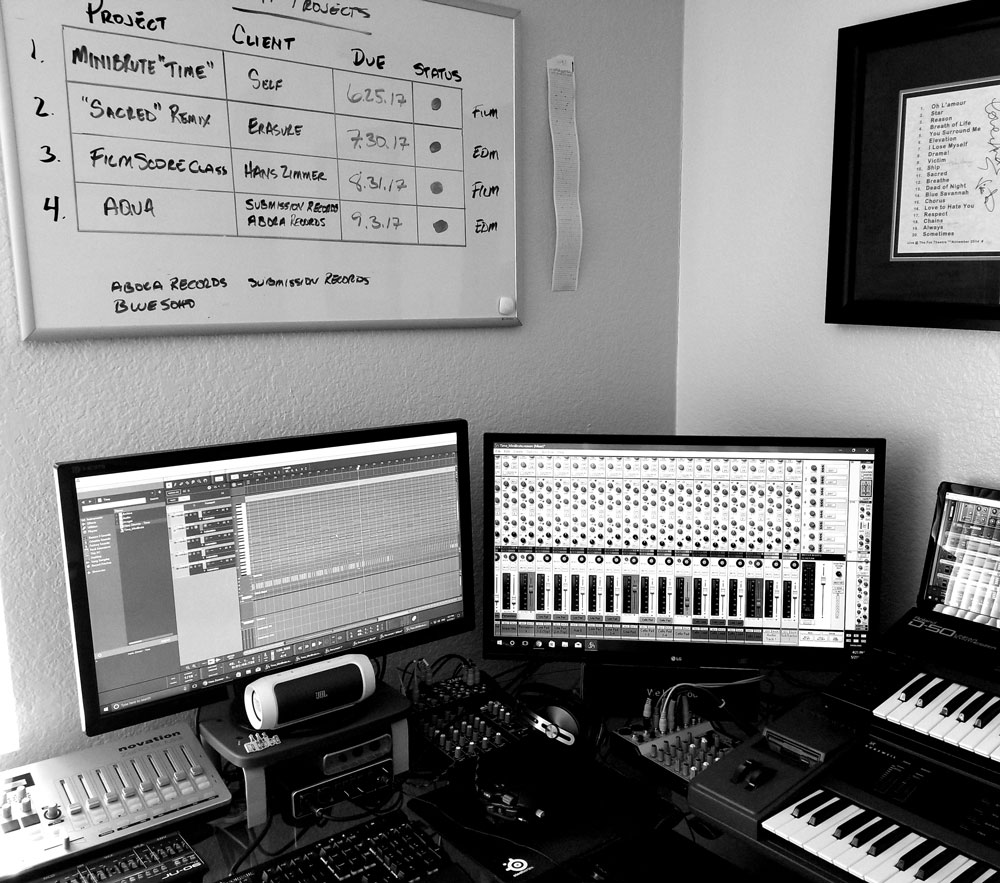
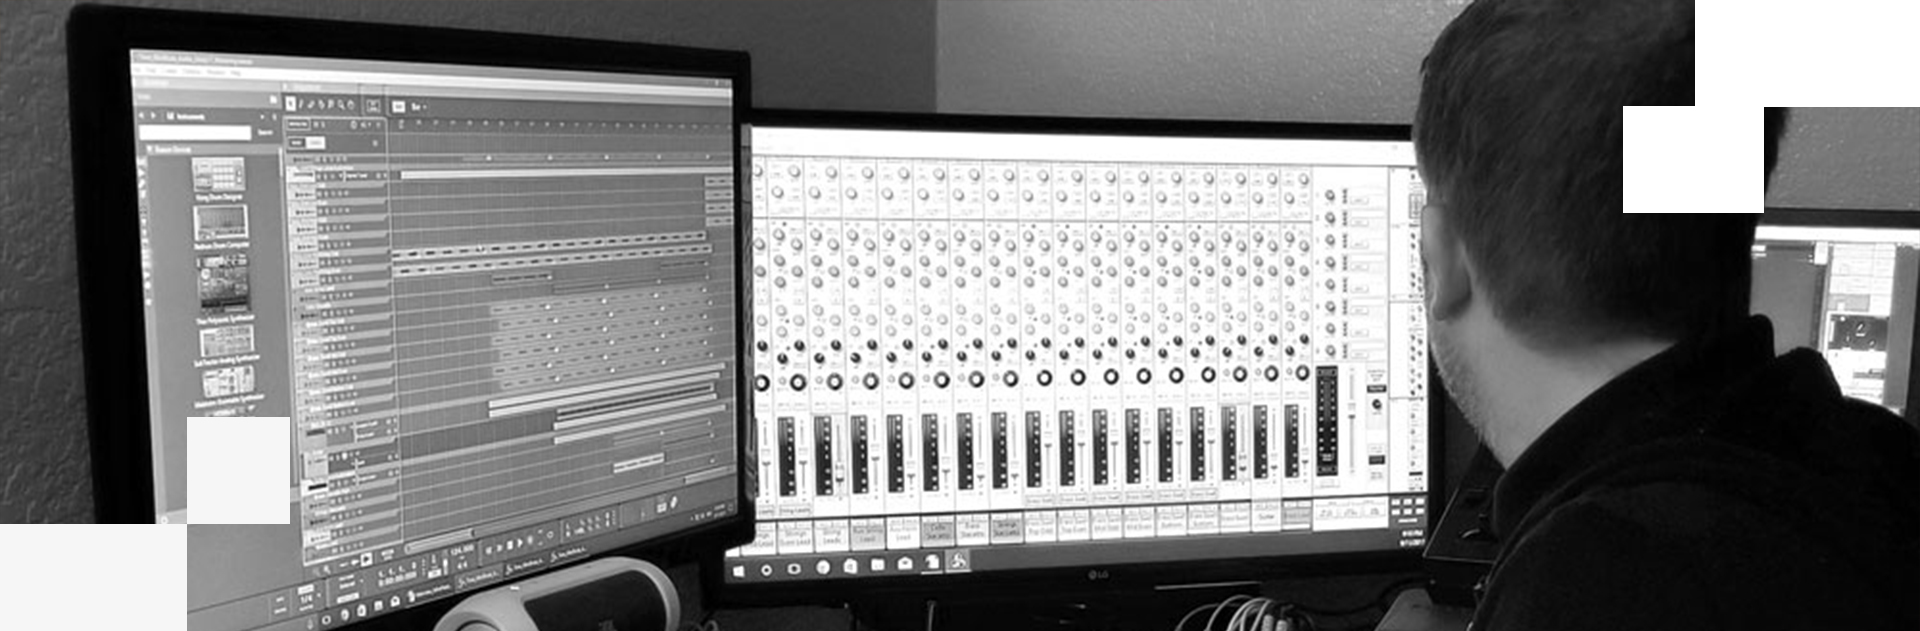
Also, the majority of the patches included the EG Release or Decay to cycle through, so individual notes had to be recorded separately on different tracks to allow the Amp and/or Filter Envelopes to cycle through all the way before triggering the next note. Total and final track count landed at 132. I recorded all parts dry, directly into Reason 9.5, playing the parts on the MiniBrute to a click-track and the parts previously recorded. I recorded the bass first. No external Midi keyboard controller was used. The recording phase took seven weeks.
5. Engineering & Mixing
Next phase was engineering and mixing. I intentionally left the Cutoff a bit open on some of the patches, then added EQ as the first stage of the channel to roll off the High-End Gain to the Filter. This allowed me to assign an automation track to raise and lower this, along with volume, to add dynamics to some of the patches like the strings. All dynamics heard on the song had to be automated. The swell of the strings, for example, included 4 automation tracks: High-End Gain for expression/brightness, Mid Cut/Boost to add presence and body, Reverb to add overall depth, and overall volume. Engineering and Mixdown took nearly six weeks.
After few more weeks to shoot the video mostly in the middle of the night to ensure consistent lighting and to edit all the footages while also listening to his mix over and over. Once he got certain of his mix, John finalized this painstaking 6-month long project in August 2017 with the mastering and the rendering of the video.
Glories are coming
Once published, the community of music makers and specialized press immediately started to praise John’s performance as an exemplary technical and artistic achievement. His recreation of Time has even been mentioned by Nick Batt and Rich Hilton during the Sonic Talk episode 503.
I did NOT expect that at all. I found out about SonicState while reading YouTube comments on lunch. I read a comment saying SonicState sent him over, so I quickly went over to the SonicState YouTube channel. I stood there waiting for my lunch and watched on my cell phone in disbelief while Nick Batt and Rich Hilton were talking about the video/music.
I spent years sitting in home studios trying to make the best music I could, and never knowing if what I was doing was even right. Listening to Nick and Rich talking about the production and music gave me an odd sense of validation. After the video was showcased on SonicState, the comments followed. They have all been amazing. It's all been very overwhelming.
If like us, you would appreciate listening to more MiniBrute-based recreations of epic scores from John Heath, you will be pleased to learn that there is more to come!
I am now beginning work on The Imperial March by John Williams from the movie The Empire Strikes Back all done on the MiniBrute. I will be creating and posting progress videos and tutorials during the entire process on YouTube. The intent is to share knowledge and address the large number of questions and private messages I have received on social media.
I am also composing a score for original project. I produce a style of EDM called Orchestral/Uplifting Trance. It's very powerful and uplifting. Think Hans Zimmer with a huge driving trance beat and epic orchestral score behind it.
Professionally, I would next love to work in a production film score studio as a sound designer/engineer. I feel I can learn more about composing in that environment, while still using my passion for sound design and engineering.
Sharing the wisdom
If you are looking for inspiration and clues regarding sound design, the chances are high that you find them here! John Heath gives you all the details to reproduce some of the impressive sounds he created for his video.
Piano
The goal with the piano was to match the soft and dark tones heard on the first 2 notes of the song, A1 and C2. Later in the song, the piano does move into the next octave and with more dynamics, but my goal was to focus on the intro, since the sound would largely be on its own. The song also begins with a bassline and soft warm pad, so my low-end on the piano needed to be controlled more than the mids and highs. I approached programming the piano as a more subtle/darker sound, while focusing on the lower octaves.
The sound design phase started with placing the filter around 75%, then using the OSC Mix to design the overall piano sound. The key to the patch was using the TRI wave and Metalizer. The 2 high-priority parameters became the OSC TRI Level and the Cutoff Freq. I spent a lot of time fine-tuning those two parameters. Once I was happy with the results, I opened the filter a bit more and recorded the tracks.
Once recorded and in the computer, I started the engineering of the entire piano parts. The first stage was an EQ that rolled off the High-End. This removed a bit of the filter cutoff/brightness, which I will use later in the song. The signal was then passed through a Stereo Separator. Each of those signal-paths then went into another EQ. I needed movement to the decaying sound, so I assigned an LFO to the MID Freq on this secondary EQ. I also boosted the MID, almost as a resonant filter. The LFO swept the MID Range Freq back and forth, slowly. I was attempting to mimic the sound of strings vibrating inside a piano.
After this secondary EQ, I ran both signal-paths through a final reverb that added depth. While in final mix, the piano always had priorities with the LOW and LOW MIDs in the first part of the song. Once the Cello and Strings were introduced, I pulled back on the LOW on the piano and handed those frequencies to the bass. The primary focus was to get the first pass of the melody to sound as good as possible. Later in the song, I automated the initial EQ HIGH END Gain that I rolled off earlier, and used this automation as velocity dynamics to the piano sound.
Percussion Hits
These percussion hits were introduced early in the song. They needed to sound big, but subtle enough not to take too much away from the piano. In the original piece, there several levels of dynamics heard as the pattern is played. The goal was to make a large, wide percussion that could cut through, while still remaining in the back of the mix.

This sound was just one of a couple that I relied heavily on the post-production FX to design. The patch is simply full noise with a specific amount of the Brute Factor. Once in the computer, I used an EQ to control the overall brightness and build the MIDs with a boost in the LOW MID to give it body. I treated this EQ almost as a Low-path filter. After the EQ, I added delay where the time is sync'd to 16th notes.
Post the delay, the signal is sent to a reverb for depth and warmth. This patch relied heavily on automated the HIGH END gain on the EQ. The first 3 hits of the sound are much brighter than the last 2 notes. The automation was done pre-delay and reverb so the automation did not impact the sound previous drums hits in the pattern.
After this secondary EQ, I ran both signal-paths through a final reverb that added depth. While in final mix, the piano always had priorities with the LOW and LOW MIDs in the first part of the song. Once the Cello and Strings were introduced, I pulled back on the LOW on the piano and handed those frequencies to the bass. The primary focus was to get the first pass of the melody to sound as good as possible. Later in the song, I automated the initial EQ HIGH END Gain that I rolled off earlier, and used this automation as velocity dynamics to the piano sound.
Cello B
This second lead violin was introduced along with the strings, so there was little room for this sound to fight for. I approached this patch almost as a brass instrument. It had to cut through the wall of soft saw waves, but still maintain a gentle tone. One of the more difficult sound to engineer in the mix stage.
The patch is actually very complex and rich in tone. It was designed to be bright with some tight pulse-wave tones. Adding EQ to a pulse wave cuts through a mix really well, while maintaining a softer quality. Once in the computer, the first stage is an EQ to shape the sound against the strings and violins. Then send that to a chorus to add warmth and widen the sound. After the chorus, the signal was sent to a secondary EQ to add movement and dynamics to this track.
I automated the MID and HIGH MID frequencies in time with the melody itself. I automated the dynamics against the swells in volume with the strings which helped push this Cello B up front in the mix as the strings softened. If you hear the Cello B and Violins, they raise and lower back and forth against each other, taking turns. It added to the over sound and dynamics to the entire mix. I was very happy with how Cello B played along WITH and not against the violins in the final mix.
French Horn
The French Horn was the final patch I designed. It was also the only patch I designed while using external FX while programming. This had to be bright and cut through the entire mix, so there was a lot of time spent on this patch. There was a Brass Staccato sound on the downbeats through this part and those could not interfere with the French Horn leads. The approach here was big, bright and up front in the mix.
The sound design stared with running the MiniBrute through the reverb on the computer. The sound has a very noticeable slower attack in both volume and timbre. I avoided trying to automate this ramp in the final mix, so there was a lot time spent on the proper amount of ATTACK on both FILTER and AMP.
Since I was designing the sound with the reverb ON, I was able to fine tune the reverb EQ and automate 2 of the EQ parameters in the mix to add clarity to the parts. The slow attack along with an automated reverb gave the sound a massive amount of space and depth. An initial EQ ensure the sound was able to cut through the mix.
Sign up to our newsletter!
Get expert sound tips, exclusive offers, and endless inspiration straight to your inbox. Built for everyone - from the aspiring producer to the studio veteran - let’s take your sound to the next level.