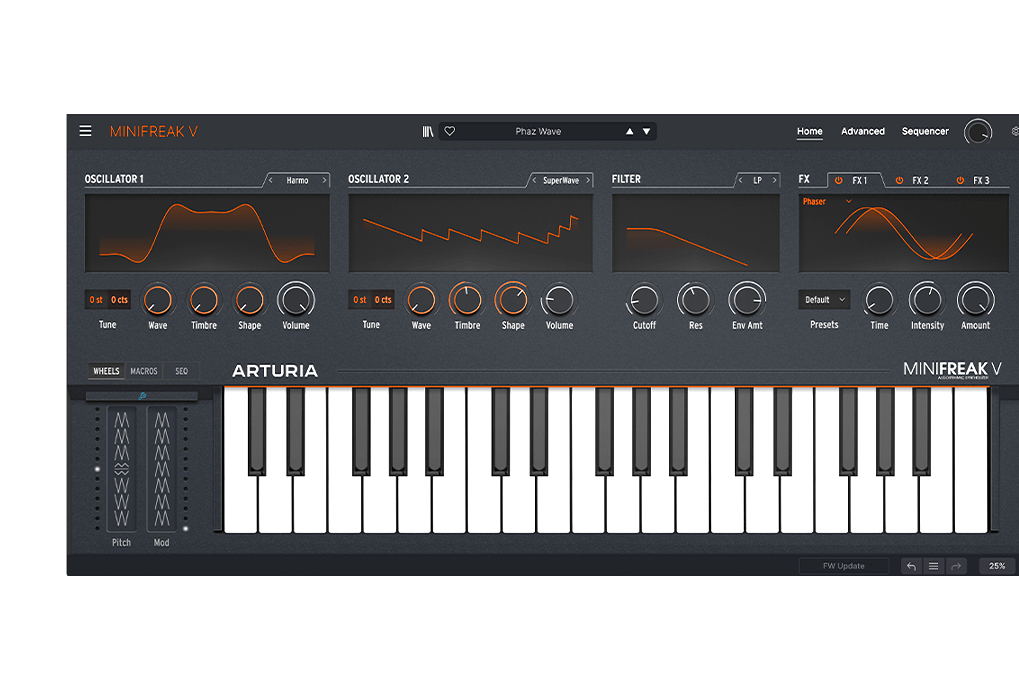
MiniFreak V
Double ration de synthèse algorithmique virtuelle
1. Téléchargez et installez l’Arturia Software Center (ASC)
L’Arturia Software Center (ASC) vous sert à activer, installer et mettre à jour vos instruments virtuels d’Arturia sur vos ordinateurs.
Vous pourrez accéder aux logiciels que vous possédez, ainsi qu’aux versions d’essai des autres plug-ins d’Arturia.
2. Connectez-vous à l’Arturia Software Center
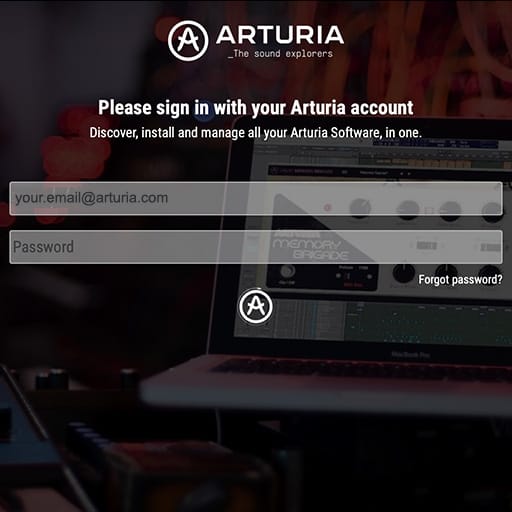
Saisissez la même adresse e-mail et le même mot de passe que pour votre compte My Arturia. Vous pourrez alors retrouver votre licence de produit dans le panneau principal.
Si vous ne possédez pas de compte My Arturia, cliquez sur « Créer un compte » et suivez les instructions.
Si vous utilisez un ordinateur hors ligne, veuillez suivre la procédure décrite dans ce cet article.
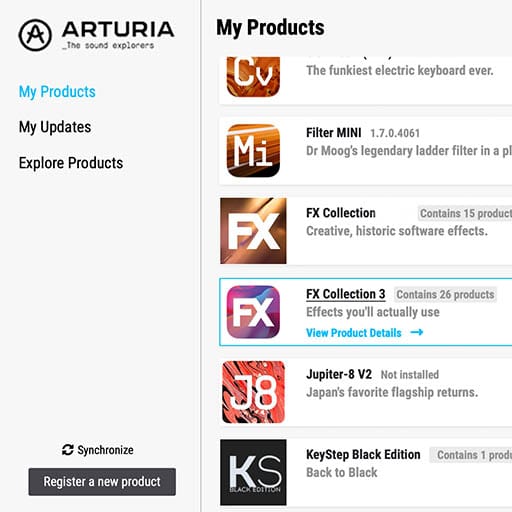
Si vous avez acheté votre licence logicielle sur le site Internet d’Arturia, elle sera automatiquement enregistrée dans votre compte. Sinon, cliquez sur le bouton « Enregistrer un nouveau produit » en haut de la fenêtre principale.
3. Installez et activez votre produit dans l'ASC
Trouvez votre logiciel dans la liste et cliquez sur le bouton « Install » pour lancer le processus d’installation en tâche de fond.
Il vous sera demandé de définir les dossiers de destination lors de la première utilisation.
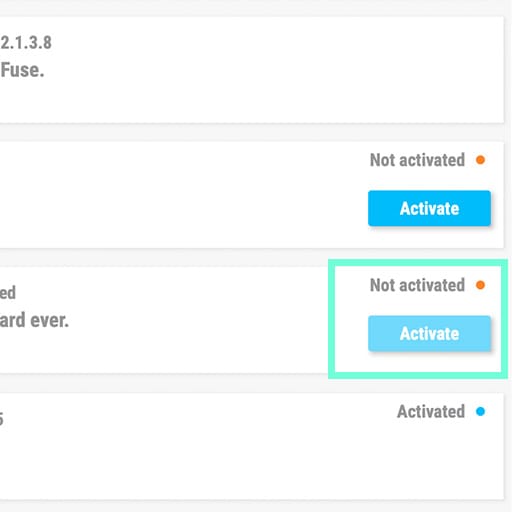
Votre produit restera en mode démo jusqu’à ce qu’il soit activé. Pour ce faire, cliquez sur le bouton « Activer ». Votre tout nouvel effet sera alors activé.
Vous pouvez dorénavant l’utiliser sans restriction sur un maximum de cinq ordinateurs simultanés. Pour ce faire, répétez cette opération sur vos autres ordinateurs.
4. Lancez votre plug-in
Votre produit n'est pas disponible en version logicielle autonome.
Il doit être utilisé au sein d'un DAW (station de travail audionumérique).
Cliquez sur les icônes pour découvrir comment sélectionner et utiliser votre nouvel effet dans les principaux DAW :
Explorez, expérimentez, profitez !

Ableton Live
Bitwig

Cubase

FL Studio
Logic Pro X

Pro Tools
Studio One
Digital Performer
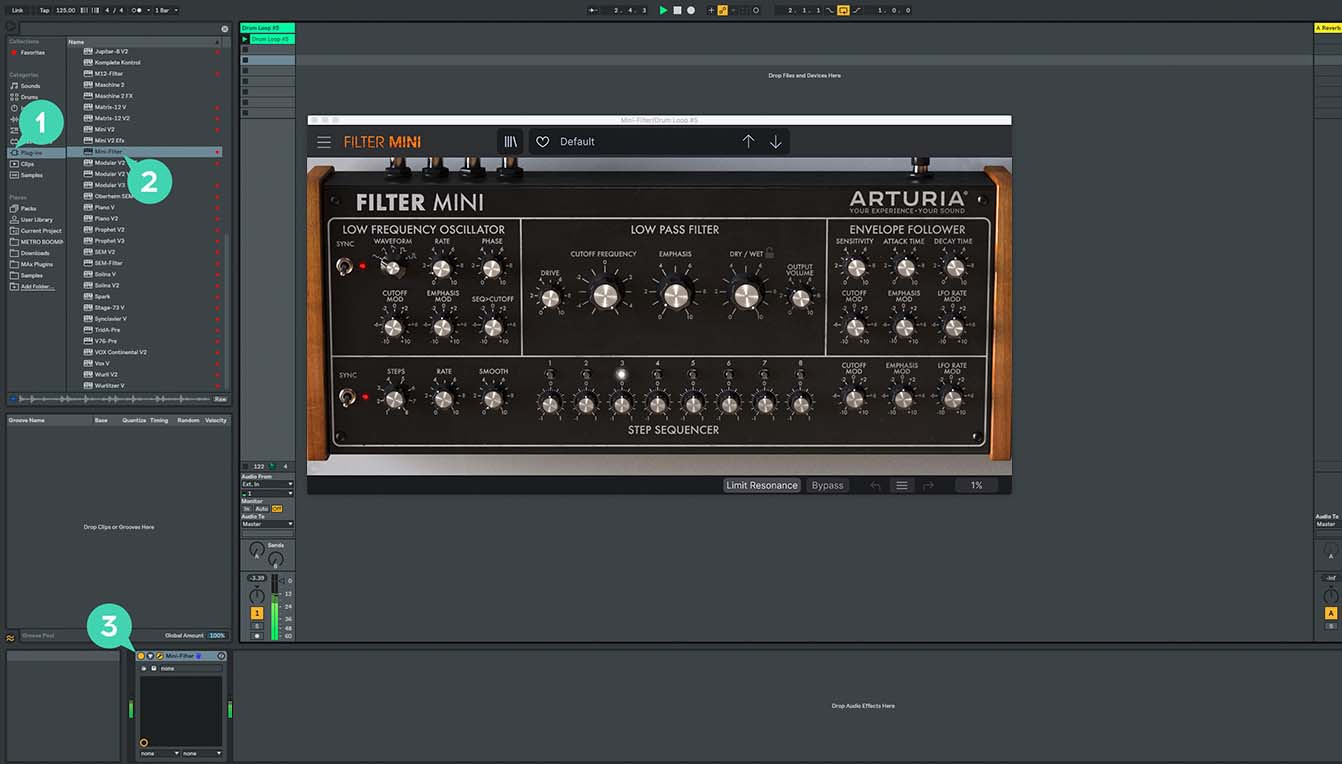
Pour Ableton Live
1/ Ouvrez le navigateur et cliquez sur la section « Plug-ins ».
2/ Choisissez l’effet virtuel que vous souhaitez dans le dossier VST ou Audio Unit*.
3/ Glissez-le sur votre piste ou votre retour d’effet.
MiniFreak V
Tutoriels
Tutoriels | MiniFreak V - Overview
Explore the MiniFreak hardware counterpart - MiniFreak V.
Sound designer Matt Pike takes you on a journey to explore MiniFreak V - fully independent software synthesizer which is a counterpart of the hardware MiniFreak. In this video you will learn about its features, hear how it sounds, and see how well it integrates with the hardware machine.
Tutoriels | Update 4.0 | Vocoder
In this in-depth tutorial, we'll walk you through everything you need to know to harness the creative power of the MiniFreak's new vocoder capabilities. Discover how to set it up, explore its unique parameters, and start transforming your voice, drums, and other audio sources into incredible new textures. Whether you're aiming for classic robot vocals or groundbreaking sound design, Update 4.0 opens up a universe of sonic possibilities for your Freak.
Tutoriels | Track Breakdown | MiniFreak FW 3.0 - Culprate
Granular Power: Inside a Full Track!
Discover how MiniFreak's new granular engines add some incredible sonic energy to a production by Culprate. Yetundey breaks down some of the key sounds used in the track and shows us the power and range of the new engines!
Tutoriels | MiniFreak Update 3.0 | What's new
Yetundey walks you through the killer new features of firmware 3.0 for the MiniFreak, unlocking the full potential of granular synthesis. With 8 new engines, granular-focused samples, an expanded factory bank, and more, this update takes your Freak to the next level of sonic exploration.
MiniFreak V
Tutoriels
Tutoriels | How To | Use paraphony for cinematic sounds
MiniFreak & MiniFreak V's voices can be extended to 12 with paraphony, letting you produce powerful, dense sounds. In this video, Lena shows you how to set yours up for truly cinematic musical soundscapes using more voices.
Tutoriels | How To | Process external audio sources
External audio processing is one of MiniFreak & MiniFreak V's most creative talents - take advantage of its filters, distortions, and effects to breathe new life into your sounds and instruments.
Tutoriels | How To | Use macros for expressive patches
MiniFreak & MiniFreak V's customizable macros play a central role in the instrument's arsenal of performance tools. Explore how to use them to inject drastic changes to tone and rhythm for bringing your ideas to life.
Tutoriels | How To | Create Performative Arpeggios
In this video, Lena shows you how to create evolving generative melodies using a combination of MiniFreak & MiniFreak V's features, centering on the arpeggiator.
Tutoriels | How To | Create Your Own LFO Shapes
Follow Lena to explore the LFO Shaper built into both MiniFreak and MiniFreak V, which allows you to create your own custom LFOs to radically shape, transform, and animate your sound design.
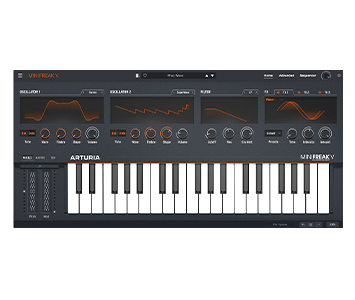
MiniFreak V
Logiciel
Manuels
MiniFreak V FR Manual
Versionfr - 4.0.0|39.85 Mo|7/3/2025
Encore besoin d’aide ?
Notre équipe d’assistance sera ravie de vous aider si vous avez des questions concernant l’utilisation des instruments d’Arturia. Vous pouvez la contacter à partir de cette page :
Demandez de l’aide